My good friend and her husband have decided that it's time for a decor overhaul of their apartment. They have a great space but over the years have hodge podged (yes that is a verb) together random furniture, so it's missing an overall cohesiveness. They have jumped in head first, and I'm sure it's obvious that I'm excited to help, give opinions, or contribute in any way that is accepted.
A major item on the list is the paint throughout the rooms. They inherited several murals throughout the apartment which are actually great but limit their color choices and after many years they're more than ready for a change. The walls are going to live in the neutral gray shades, pretty much throughout the space, leaving room for furniture and accent pieces to really play up their personalities and fun.
First on their list, an upgrade to their standard Malm IKEA dresser. For inspiration we went, where else, to Pinterest and found this idea:
So with inspiration in hand we went to the hardware store to pick the paint color. Originally planning to go with a traditional navy, we were faced with an amazing teal option that threw that into question.

Feeling bold, she picked the more teal/aqua blue - my favorite, though I attempted to keep my opinions to myself - in a high-gloss finish. We also picked up an ivory white for the overlays. Now we were ready to work...
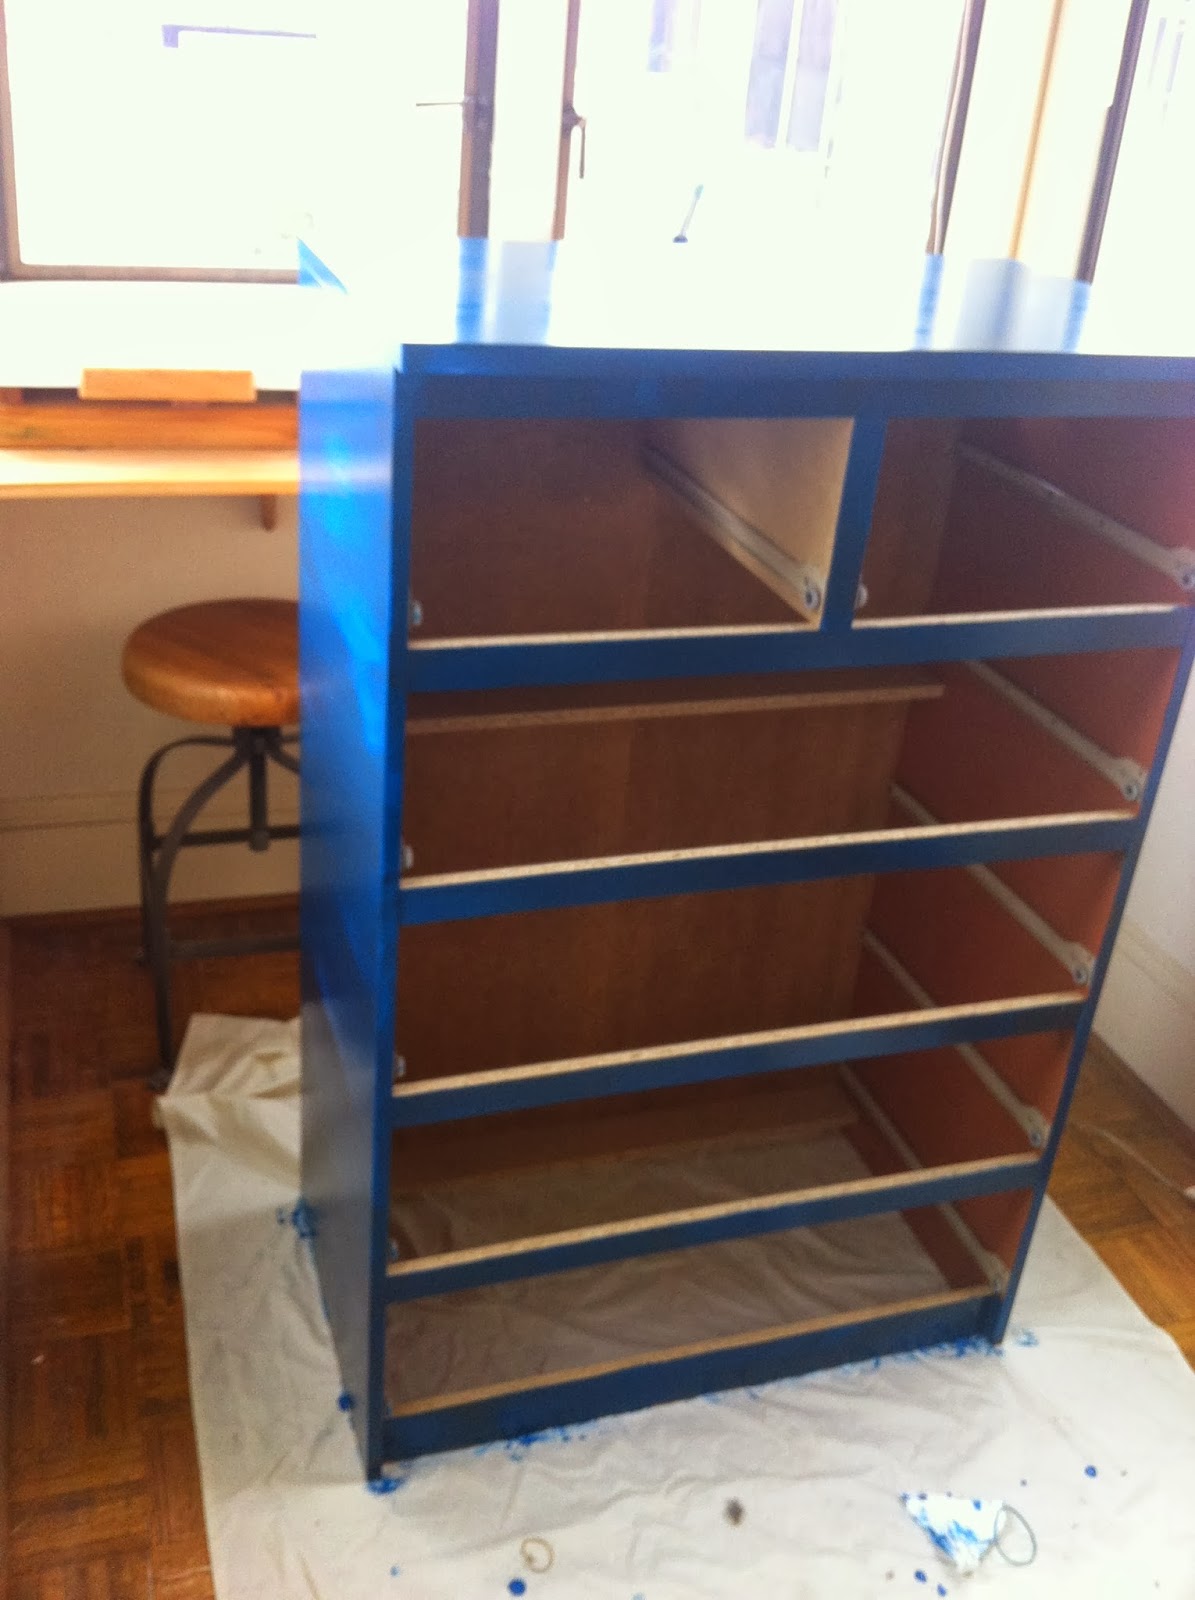
Our first step was to use a liquid deglosser, instead of sanding. We were in an apartment without a lot of protection or tools and were happy to forego all the sanding dust. One tip, we didn't do this until the last coat but if you are using brushes and not a sprayer, I would definitely use Floetrol to thin out the paint and help remove some of the brush strokes in the paint. One nice thing on this IKEA dresser is that it was super easy to pop the drawer faces off for easy painting. After letting that dry, we started with a first coat.
You can see that the first coat didn't cover very well, and looked worryingly like the blue tape color instead of our chic deep teal. Not to be dissuaded though, we went and got Thai takeout while we waited for the first and second coat to dry.
Then it started to come together
You can see the gloss reflecting the light and the color is much closer to what we wanted it to be. Success!
I hate to say this but the completely finished result for this project is going to be a cliff hanger. My friend's husband has access to a woodshop and is going to be creating the overlays for the drawers. Until those are done we can't call this complete, but, the majority of it got done on super bowl Sunday while the Broncos got the asses handed to them...heard it was a pretty sad game and we didn't miss much by painting instead.


