Showing posts with label DIY-Projects. Show all posts

Monday, April 27, 2015

Luxe leash for less

Latest dive into Pinterest project waters completed.  For a while now I've been obsessing over the rope dog leashes that are all around online.  I love how they look (no shock here, they are slightly nautical after all) and how they feel.  What I don't love is how much they cost! Here is one of the ones that was my inspiration but averaging $50 is out of my desired price range.
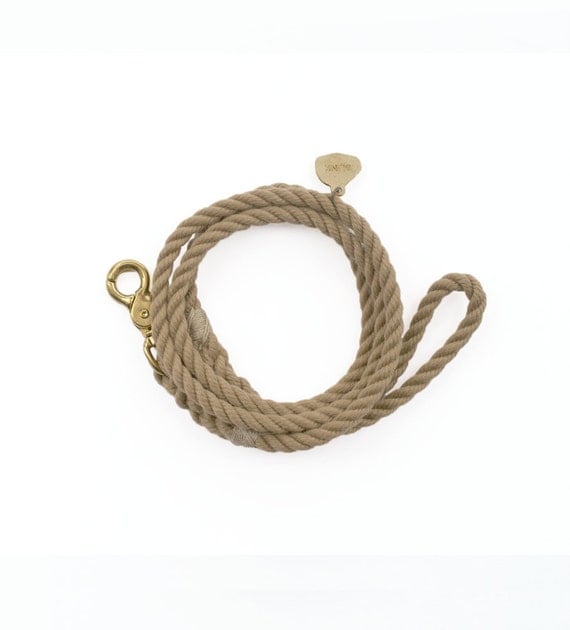
Marine-Grade Dog Leash in color Traveler  
Now here's mine:


I am kind of obsessed with mine! I'm totally in love with the hardware and the rich look of the final product. It has weight and a great feel.  The only thing I added that is not in the photo is that I wrapped hemp twine around the top part of the handle loop to create a more visible handle piece. 

Forgive me for not taking photos of the process but I can give you a breakdown of the supplies and what it took to get the finished product which ran me an approx. cost of $13 for the leash and it's parts (though more out of pocket for the total amount of rope I actually purchased)
  • The rope is a 1/2" diameter pure cotton rope from KarensWeddingShop on Etsy, it was $16.29 plus shipping for 25' of the rope (so I have a bunch left over!).  She uses hers for nautical decor projects but it is sturdy quality rope. This seller is based in Canada so the shipping was steep and brought the total to $36.00 but if you divide that for the amount of rope I used for the leash (approx. 5 ft) then we're still only talking about $7.20 for the rope used, with some left over for more projects. 
  • Next were the rope clamps that hold the rope together where it's looped, which I found on Amazon.  They are most typically used for horse tack and to create lead ropes. I got the solid brass ones because they matched the look I wanted but they come in silver as well for a bit less if you want to go that way. They are about $3.00 each. I think you can probably also find these items at a horse tack shop if you have any of those local to you. 
  • The last piece was the hook.  I found mine at a local ACE Hardware (one of my favorite places) and got a couple options, again in the brass/gold color. Remember to get one with a big enough loop on the end to fit your rope through.  These are around $2.00 each.

I love the white but realized the impracticality of it so I have plans to get some gray dye to have on hand if it gets too dingy but right now I'm loving it as is.  

Next I want to make a collar to match for Mabel but thinking I may want a narrower bit of rope because this does have more haft to it than would be ideal for a collar. Also, I need to figure out a better way to clasp/clamp the ropes. I'll keep you posted.

Also a next step is to make more using the rest of the rope and get it up on RadBaby.

Sunday, April 5, 2015

You would make a horrible bulimic

I've recently found a new track of inspiration that has gotten me back to doing some art which is actually a wonderful bit of calm and sanity these days for which I am incredibly grateful. Hand lettering and illustration.  This is not really a direction I've ever explored before but I was drawn to the look of the hand lettered signs that are ever so popular these days and then would be over come by that moment of "ugh, I'm not paying for this, I can make that myself." Only this time I actually did!

I don't think it's that much of a departure because I was also drawn to doing art that was not separate from the human experience. These are less related to the human experience in the abstract and more related to the human experience of me and my friends.

I have two completed, one that I like and show below that are based on either sayings, quotes, or in this case an joke that resulted from a ridiculous conversation. Luckily, I have a best friend who as lists of quotes from years of our hanging out that are just begging to be illustrated.  Here's hoping the inspiration lasts because I really enjoy the end product of this one.


Entitled "Yum", printed on heavy weight paper and, if you're so inclined, is for sale at RadBaby.

Friday, January 9, 2015

Oops

Tonight I had every intention of coming home and treating myself to an evening of pampering. I had even picked out some DIY spa treatments on Pinterest to try tonight.

Instead, I am currently on my couch in a tank top and underwear, with a fan directly on me, plowing my way through my Hulu queue. 

Ah, what a glamorous life this single gap leads...

Monday, April 14, 2014

30th year is nearing a close - time to check the projects list

As you are all clearly aware, I have avoided checking in on this list for the last several months.  While, I haven't done nothing, I havent' done a whole lot either.  But, as Spring gathers speed on it's way to Summer and my 30th year gets ever closer to a close it's time to evaluate (and give you an update on the RVT2103 - to come soon).  Ok, to the list:
  1. New Bed:  DONE! I think that there can definitely be a follow-up project to add a few more items tot the decor of the room overall, including new bedding but the new bed is in and great!
  2. Color in the Kitchen: Truthfully, haven't even visited this one
  3. Build 4 x 4 workbench:  As seen at an artist studio at American Steel Studios.  DONE! I'm going to call this done, but amended.  I recently created the top of a workshop table based on a Pinterest project I saw but using scraps I had in the workshop.  Currently it is missing legs but it's resting on top of my sawhorses and maybe provides even more functionality than the original project.
  4. Build nightstands: DONE!  Really happy with my suitcase nightstand and looking for a second suitcase to complete the set.
  5. Run a race.  Hmm, didn't sign up for one. If I wanted to excuse myself I could talk about how I've run them in the past, and I've recently timed myself running (like a race against myself).  So, done?
  6. Front yard makeover: Partially done/Postponed, my grass and other plants are doing really well.  I added some more plants for pops of color and some along the side of the house.  Happy for now with long term plan for xeriscaping.
  7. Back yard makeover: Partially done.  I have moved several plants and created an all succulent planter. They are starting to bloom and I can't wait for it to fill in!  I also planted two tomato plants, a tomatillo, zucchini and carrots.  No new fruit trees yet but still on the list.
  8. Complete one new woodblock: Done, pictures to come.  I'm not in love with it but I don't hate it, which is a start.
  9. Take an art class
  10. Make a "pouf": Here's one project but maybe search because I know there were a couple that did it on the cheap using IKEA rugs I think. Still have not attempted it yet, however.
  11. Sew a complete item of clothing (more complicated than a skirt though) using a pattern. DONE. I made a fairly hideous pair of kulots/gaucho pants for our Troop Beverly Hills Halloween costume this year.  While it was not a true pattern, I did use a pair of pants I already have to create this pair and had to make some sizing adjustments and amendments as I went.  Let's just say I'm not destined for Project Runway anytime soon
  12. Design and get a tattoo
  13. Make Christmas presents for my neighbors: Done-ish, I did not make Christmas presents for my neighbors but I did make really adorable Christmas presents in mason drinking glasses for my coworkers, which I'm counting.
  14. Build and paint a bean bag toss game: Canceled, felt like too much time but have done some other wood working projects
  15. Sew baby blanket:  DONE! See the post about making the blanket.  I recently got a photo back from my friend with her one month old swaddled up in it - baby adorableness.  I also have two more babies coming that need blankets, but not for this list!
  16. Add a new item for sale to RadBabyDONE!  See the post about the new earrings we added.
  17. Complete a Coursera course: DONE I completed all the lectures and assignments for Dino 101 - it was awesome.  I have given up on the Intro to Computational Design.  I enjoyed the first two modules, programming and photoshop, but the third is audio which does not interest me.
  18. Create a housewarming gift for friends that are moving. DONE!  I created a great housewarming gift in a mason jar for my best friend's brother and his girlfriend.  It took me forever to give to them but that is not part of this project so there.
  19. Add shelves and/or decor to the bathroom: DONE!  This one was a project from Pinterest, and a rare situation where I actually like my version more than the Pin.
  20. Go to Zumba classes 2 times a week for at least a month. DONE!  Successfully accomplished and still going.  With the exception of some sick days we have been consistently going every week and plan to keep at it. It's a great break and separation from the day.  Plus an amazing instructor, which makes all the difference.
  21. Attach a charging pad in the new nightstand so that phone can charge just sitting on the nightstand. Canceled, after researching the cost of a charging pad this really wasn't worth it.  But it would be good to build something for my cords and charges to live in, other than the floor.
  22. Build an acoustic speaker for iphones. DONE!  I actually built two, and gave one to Meg for her birthday.  I'm using this idea as a prototype for the next Coursera class I'm taking (Design) and am hoping to refine the design even more.  
  23. DIY Christmas decorations: Also from Pinterest, found these two projects and really enjoyed making and using them for decoration.  The DIY garland and the "Christmas Trees"
  24. Rehab a Dresser: DONE! Ok, so this wasn't technically a project for me but it was a project, I definitely helped lead the charge so I feel totally ok with counting this as a completed project on my list.
  25. Fix headliner in Petunia: DONE!  Not a total fix but makes me happier than it was and works with my budget.
  26. Rehab Armchair: DONE!  Great find at Goodwill, now an even better fit in my house.
  27. Salon wall in bedroom:  Been collecting frames as I go and the wall in my bedroom needs some love. Get them hung!
  28. Fix and paint/stain coffee table: The original project made in my workshop needs some TLC
  29. Plant Edibles: DONE!  Mentioned earlier but I planted two cherry tomato plants, carrots, a tomatillo and a zucchini plant.  I'll let you know what kind of harvest I get.
  30. Travel: DONE!  My travel bestie and I are going to Ireland this summer.  Details are coming together and ticket prices are being monitored.  This trip will get in just under the wire and I can't wait!
Wow, I have to admit that in the beginning I did not necessarily expect to be able to come up with 30 projects.  The list has definitely had some amendments and changes but overall it's pretty exciting to be able to see all that I've worked on for a year.  The bold are projects still to finish but 6 our of 30 ain't bad.

Sunday, April 13, 2014

Petunia Gets A Makeover

Petunia is my car, she's a 2000 Beetle and I've had her since I was 16. In case you can't tell from my anthropomorphism, I'm attached.  Unfortunately the headliner was sagging all around and even coming out a bit.  So after checking on getting it replaced - way out of my current budget - I went searching for some DIY solutions.

I didn't actually find any I liked but I remembered that I'd seen a friends car that used flat head tacks, so I figured I'd give it a shot.

I bought 200 and set to work.  Petunia has a really high ceiling, very dome shaped, so I knew that it probably would never hold to try to get it all the way up and tight enough that the fabric would continue to cover so I settled for just a bit of a lift.  Also, hope to prevent any additional sagging.

So pleased!  It worked!  It takes a check in every once in a while and push a pin back in here and there but I got about 2 inches back and it looks less shabby.  Now there is no actual fabric hanging down and allowing wind to get in and pull it down more as well.

Think I'm going to add a few more and go for a nail head upholstery look - will get pictures then.

Tuesday, February 4, 2014

Helping out a friend

My good friend and her husband have decided that it's time for a decor overhaul of their apartment. They have a great space but over the years have hodge podged (yes that is a verb) together random furniture, so it's missing an overall cohesiveness.  They have jumped in head first, and I'm sure it's obvious that I'm excited to help, give opinions, or contribute in any way that is accepted.

A major item on the list is the paint throughout the rooms.  They inherited several murals throughout the apartment which are actually great but limit their color choices and after many years they're more than ready for a change.  The walls are going to live in the neutral gray shades, pretty much throughout the space, leaving room for furniture and accent pieces to really play up their personalities and fun.

First on their list, an upgrade to their standard Malm IKEA dresser.  For inspiration we went, where else, to Pinterest and found this idea:
"Anne" Overlays on a Malm dresser.  I have this dresser..I should re-do it for the guest bedroom or office

So with inspiration in hand we went to the hardware store to pick the paint color.  Originally planning to go with a traditional navy, we were faced with an amazing teal option that threw that into question.


Feeling bold, she picked the more teal/aqua blue - my favorite, though I attempted to keep my opinions to myself - in a high-gloss finish.  We also picked up an ivory white for the overlays.  Now we were ready to work...

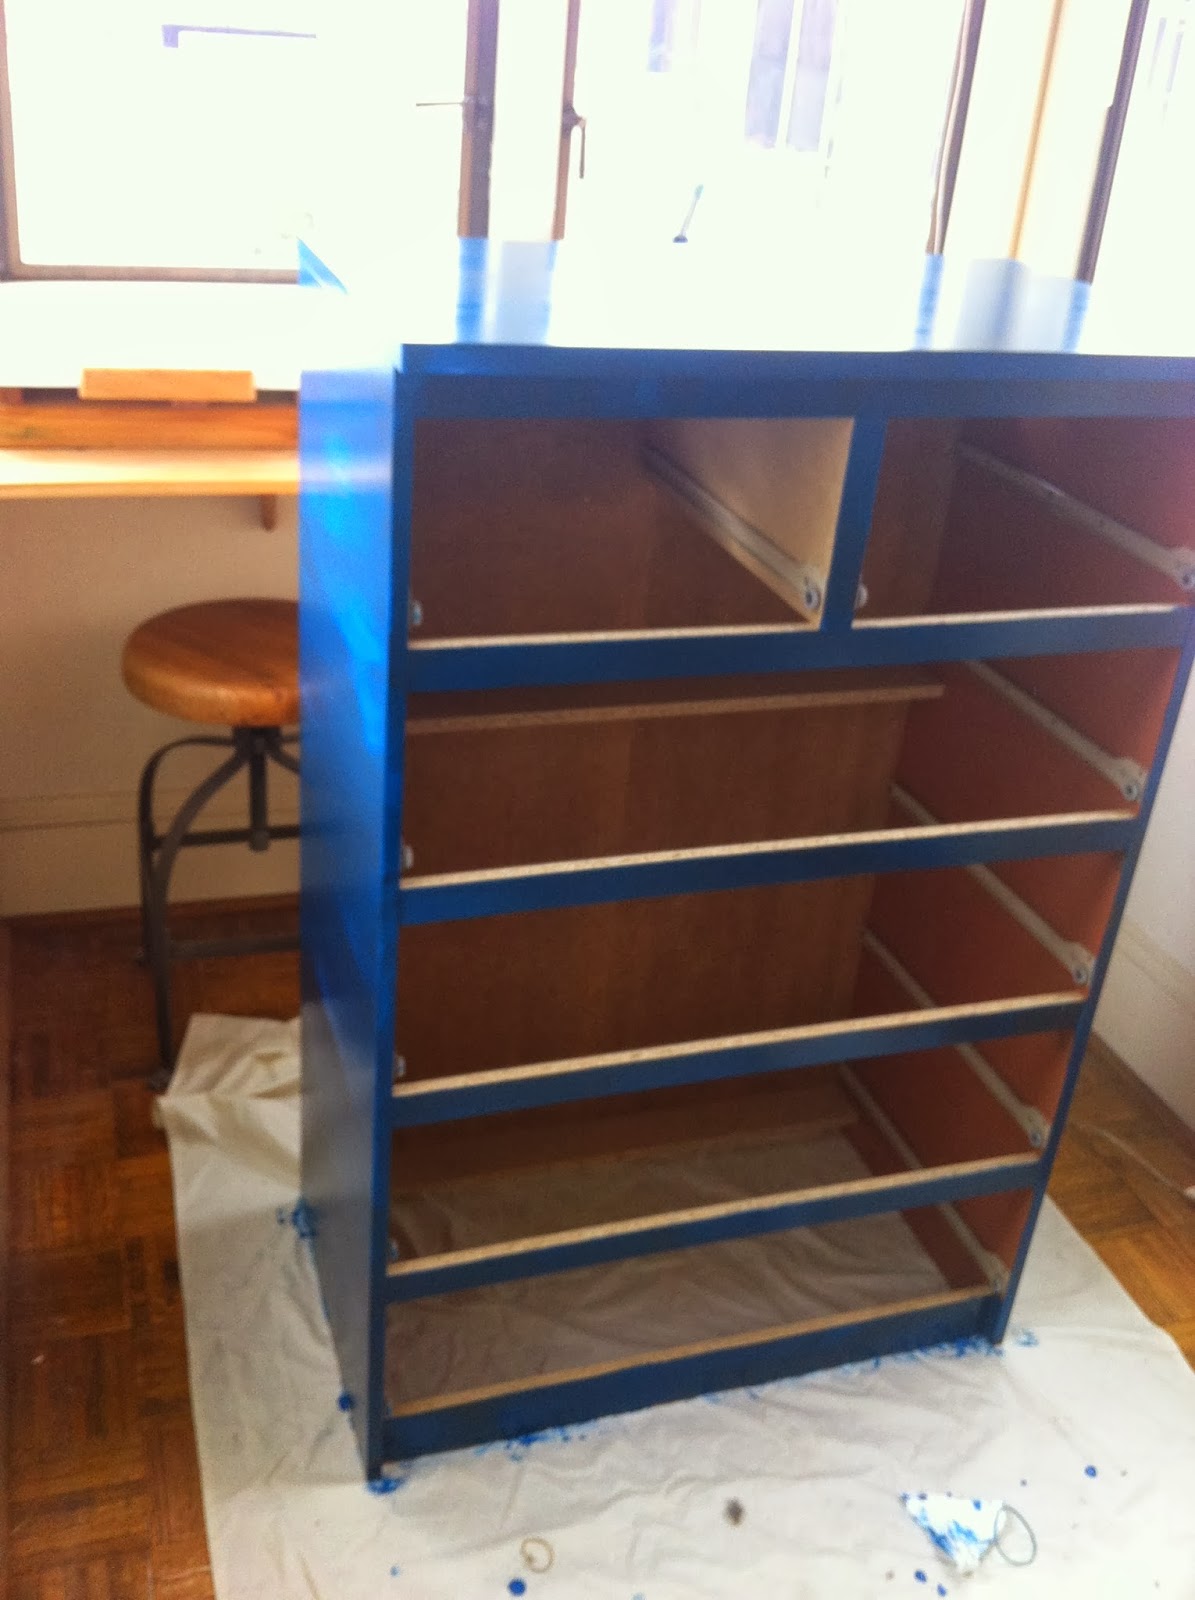
Our first step was to use a liquid deglosser, instead of sanding.  We were in an apartment without a lot of protection or tools and were happy to forego all the sanding dust. One tip, we didn't do this until the last coat but if you are using brushes and not a sprayer, I would definitely use Floetrol to thin out the paint and help remove some of the brush strokes in the paint.  One nice thing on this IKEA dresser is that it was super easy to pop the drawer faces off for easy painting. After letting that dry, we started with a first coat.


You can see that the first coat didn't cover very well, and looked worryingly like the blue tape color instead of our chic deep teal.  Not to be dissuaded though, we went and got Thai takeout while we waited for the first and second coat to dry.

Then it started to come together


You can see the gloss reflecting the light and the color is much closer to what we wanted it to be. Success!

I hate to say this but the completely finished result for this project is going to be a cliff hanger.  My friend's husband has access to a woodshop and is going to be creating the overlays for the drawers.  Until those are done we can't call this complete, but, the majority of it got done on super bowl Sunday while the Broncos got the asses handed to them...heard it was a pretty sad game and we didn't miss much by painting instead.


Goodwill Find!

As teased, here is one of my projects that I got through the other weekend.

After a leisurely brunch with a friend we decided to walk over to the Goodwill that was near where we were eating.  No, I wasn't looking for anything in particular and no, that doesn't matter.  After perusing the odds and ends we made it over to the furniture area.  That's when I saw it!

An amazing teal blue chair with bronze studs along the piping. It was listed at $35 dollars which was a steal in itself but when I got to the cash register I only paid a whopping total of $29 for the chair, a picnic basket, 2 frames, and 2 books!  The prices a Goodwill never get old, it always feel like I just won a contest or something.  After some maneuvering of the backseat, and strategic angling, we got the chair in the back of my Beetle and I headed home with my bounty.

The chair was great but had a chocolatey brown wood for the legs and on the arms that just dragged the whole thing down.  Spray paint to the rescue.  I had on hand an ivory, high-gloss, spray paint and after taping/papering off the fabric and quickly sanding down the legs I went to work.  It took two coats and I am so happy with the final look of the chair.  Now I just need to find the perfect place for it in the house...

Here are the pics, in order of production - please forgive the angles on some of them, but I remembered to actually take pictures this time:


Thursday, January 16, 2014

Old Timey Christmas Garland

I'm still building out my personal collection of Christmas decorations and like the idea of making them when I can.

I found this project on Pinterest and after collecting some scraps from fabric stores nearby set to work. 

First I cut a conservative amount of strips of the fabrics I gathered (1). I included some red and green felt in my garland.  I liked the idea of the differing weights mixed together.  My length was limited by this because I only purchase 2 squares of each, though this worked out great for me, the garland could have gone much longer had I purchased a few more.

I used some hemp cord that I had lying around as the base, thinking that it's strong and will hold up for years.  I didn't cut this ahead of time, because I didin't know how long it would be in the end. I don't plan ahead like that - sometimes works and sometimes bites me in the you know what.  I tied a loop in one end and looped it around a water bottle to hold the end up, you want that end stable, like when you used to safety pin friendship bracelets to the knee of your jeans - remember?

Next step - start tying (2).  That's pretty much it.  I picked the order that I wanted for my garland and just kept going.  I put on my Hulu and just plugged away.  It took me a couple evenings after work but I got it done in time for the holidays (even if I didn't get it posted).

The finished product (3) hung across the entry to my living room and brough cheer immediately upon entering my house.  Very pleased with this Pinterest success, definitely one of the easier DIY Christmas decorations that I found that still looked really good.


Tuesday, December 10, 2013

DIY Christmas Trees

So I have had the supplies for this project for ages and finally my friend and I attempted it.  The project I did is kind of a combination of these two original pins:

DIY Cute Decorative Christmas Trees. I would skip the bells/ornaments and keep it as is.  Could reuse the same styrofoam cone from the craft store, twine/string, and starch or adhesive spray... ?          DIY String Chandeliers

True to myself I made do with what I had on hand which was a very very thin and uneven green thread.  Pulled it through the glue, corn starch mixture and wrapped it around my styrofoam cones of three sizes.  Before starting I wrapped the cones in saran wrap and then put a layer of vaseline on that, to (reportedly) allow the "trees" to easily come off the molds once dry.

As you can probably guess this is not exactly how it went down.  While it was a wonderfully fun and messy project I could tell pretty early on that these trees were not going to politely pop off of their forms without some work.

Lessons I learned:

  • When not using a balloon that one can pop and remove from the shape it is necessary to wrap loose, even with the vaseline and saran wrap.
  • Use real string that is not super thin and breaks apart in your glue mixture - just takes so much longer to wrap it.
  • A glue and corn starch mixture will not dry clear.  I know this should have been obvious but call it a brain fart.  Not a mistake because they are meant to be Christmas-y so I'm calling them frosted, but still.
  • If you smash a foam cone enough it will eventually pop out from your "tree".  Just make sure that your tarp from the glue messiness is still down for this part too.
End results are not so bad.  Tried out two different styles of wrapping the string, and I'm pretty happy with a new DIY decoration for this year.


Friend Christmas

My core group of besties - truthfully they're family at this point - and I have decided, in the last few years, that we don't really need anything and we don't need to be spending ridiculous amounts of money on each other for gifts.  So, last year we wrote up about 50-60 theme ideas and put them in a bowl and picked.  Each year we'll draw a new theme and get each other something that fits the theme but we are not allowed to spend more than $10 on each person's gift.  The one of us who's good at saving things keeps our theme ideas and each year as the holidays roll near we draw the theme of the year.

Last year's theme was Middle School.  As you can imagine this resulted in some pretty hilarious gifts, including friendship bracelets and hair dye (we were in middle school in the 90s after all).

This year's theme: Diamonds!  Diamonds for under $10 dollars? Clearly we are going to have to get creative. I have decided on my present and it is currently being crafted in my workshop, though with no elves to help it is going rather slowly, as my workshop is my garage and my garage is rather cold in the evenings after work.  I obviously can't tell you what it is, on the off chance, that one of my ladies reads the blog, but as I'm sure you can all deduce it is from a Pinterest project, or two, and I hope it works.

What would you get/make for a Diamonds theme gift with a $10 max?

Monday, December 9, 2013

Mason Jar Project - Check!

A little while back I posted a Pinterest project that I was going to try to make, this one.  Well I did, it turned out pretty well and I was finally better about documenting my steps in photos.

First was to determine what piece of board I wanted my jars to attach to.  I actually had this piece on hand and so decided not to spend extra money on another piece and work with what I had.  After a Home Depot run to purchase the plumbing clamps and hooks (I added these on a whim - not part of the original project) I was ready to start.

Immediately I ran into my first hiccup.  No where in the Pinterest project does it clearly communicate how the plumbing clamps are "screwed on" to the board - time to improvise!  I didn't have any nails small enough to get through the slats on the clamp itself, and I didn't have wide enough staples in the staple gun to span the width and securely hold them in place. I ended up taking two screws and placing them on either side of the clamp.  Not screwing them in all the way first, placing the plumbing clamp and then screwing them both down so the edges are held in place by the lips of the screws.  Be sure to place the clamps in a way that still allows you to adjust the size around the neck of your mason jars.

Next I placed the hooks.  I measured and placed them roughly 1.5" apart from each other.  First drilling a small pilot hole then hand screwing in the screws on the bottom of the board.  I want these to be for hanging necklaces.  I have some great earring holders made from frames and screen but at this point no good way to store and display my necklaces.  The hooks go all the way across the bottom.

The end result before testing out my jars allowed for 4 mason jars and hooks along the bottom.  I attached at sawtooth picture hanger in the middle of the back (no picture) to allow for easier hanging.  I substituted much longer nails for the ones that came with that piece of hardware for some added support and security.


Now it's time for the second hiccup.  Due to my improvising for getting the plumbing clamps to attach to the board, the jars while mostly secure were not held in as tightly as I would have wanted by the clamps.  They were almost secure enough but had wiggle that sent visions of mason jars plummeting to my floor and shattering through my head.  Originally I liked the idea that I would be able to take the jars down as needed from the adjustable plumbing clamps but gave that luxury up for a more secure hold.  I used clear, heavy duty epoxy glue, a dime size dot on the jar and a dime size dot of the plumbing clamp where the screws held it to the board.  Then placed the jars and tightened.  I allowed this to dry overnight and then it was time to hang.

Here's the finished product.  Not exactly as I imagined in terms of functionality but overall I'm pretty happy with the resulting look. Please forgive the grainy picture, as you can see I'm still deciding what exactly to store in each of my jars.


Wednesday, November 27, 2013

Thanksgiving Dinner Contribution

My mason jar holder is currently on hold - I got through almost the whole project, however the last step is only hold. Due to the way that I attached the plumbing clamps the jars don't get cinched in tight enough to actually hold in.  A gentle shake sent two loose.  Some more tinkering to come...

This year each of us are bringing a dish to Thanksgiving dinner - this is new for us and given our collective cooking experience good go really wrong or really right, so fingers crossed.  I am making a gluten free Spicy Cheesy Bread Stuffing.  I found this recipe through Pinterest (where else?). 

Last night after work I braved the crowds at the grocery store.  Side note about myself I very much dislike grocery shopping in general and avoid holiday related grocery shopping whenever possible.  Though this was unavoidable so I bit the bullet and went in, shopping list in hand.  Happy to report it was not nearly as dreadful as I had envisioned.

I did spend a bit of time trying to find the almond flour necessary for the recipe and enlisted the help of a, somewhat attractive, store employee (always look for the cute ones when you have a question - it may take longer but, in my opinion, worth it).  My question led to a short, somewhat flirty, discussion about the gluten free craze sweeping California, if not the nation.  I shared my humble opinion that I think the general extremism is crazy and that the trend to raise your children gluten free seems like a bunch of crap.  

I believe in whole grains and steering clear of super processed foods as a general rule to but as with all things, truthfully believe in moderation.  I am making a gluten-free dish because my dad actually has Celiac and I want him to enjoy the stuffing too - assuming this turns out enjoyable. With a smile from the flirting and ingredients in hand I leave the store and head where any responsible person who is making a dish for her family's Thanksgiving meal would.  To her best friend's house to watch Secret Princes.

Small tangent, this show is hilarious and you should absolutely watch it!
After getting sucked into 4 episodes I went home and unloaded the groceries.  Hit by a sudden burst of inspiration I baked the first part of the recipe, the skillet "bread" that needs to be made a day ahead for the final stuffing dish.  Yay responsibility! Actually looks pretty good, and tastes almost as good if I do say so myself!

UPDATE: This stuffing turned out delicious!  I didn't read all the way through the recipe (story of my life) so I didn't actually bake and dry out the skillet bread two days before but even with that snafu this was definitely an excellent contribution to the meal.

Sunday, November 24, 2013

Gonna try to make this

On to the next project!  Gonna try to make this Pinterest project:

I got some scrap wood from my mom recently and love, like everyone else, the mason jar look.

Off to home depot to get the rest of the supplies I need.

I'll keep you posted!

Sunday morning

I'd like to say that this post is about how prepared I am for the week and that I purposefully spent my morning preparing healthy meals for my week.  While the results are nearly the same this is not what happened.

What did happen is that last week through a combination of good intentions and excitement at a farmers market I purchase several healthy options for food for my week.  Last week I made some great ground turkey dishes, including turkey meatloaf muffins - perfect for a quick meal - and an egg frittata.  Leaving to sit in my kitchen, awaiting preparation, a large spaghetti squash, a head of cauliflower, some small (adorable) zucchini from a farmers market, and some purple tomatillos and a pepper.  There they sat all week, through my late nights where the most I could manage each night was to get my contacts out of my eyes before crawling gratefully into my flannel sheets.

So this morning when I was contemplating what to make for breakfast and realized I was nearly out of everything except the items listed above and that some of them were bordering on turning bad I decided to make them all.  So you see the spoils of my morning are in fact a result of procrastination and failing to prepare but in spite of this I still have meals for my week!  Take that adulthood!

Homemade Salsa - I used a Rick Bayless recipe and while I still love Herdez Verde because of the vinegar kick this is pretty delicious and more satisfying as it is made by yours truly.


Spaghetti Squash - I roasted the large spaghetti squash that has been staring at me from my counter top all week.  I still have a large tupperware full of the strings to make some different iterations all week but this morning I sauteed the zucchini, olive oil, garlic, pepperoncinis, and some marinara sauce.  When ready I poured it over about 2-3 cups of the squash, about a 1/4 cup of shredded mozzarella cheese and stirred.


Roasted Cauliflower - I found this recipe online.  I have a deep love of anything with a vinegar slant of lemon juice, for me it cuts through oil and is just a flavor I love.  I used this recipe online.  I chopped mine up a little more than suggested in the recipe and used some of my lemons from my prolific lemon tree in my backyard.  This is delicious and I'm restraining myself from popping it into my mouth and finishing it all before the week starts.


I have to say that I'm pretty impressed with myself and feeling pretty smug - you know maturing and all - and can't help but feel that my former roommate, an incredible cook who definitely made the most of our meals when we lived together would be proud.  She's even has her own blog where she shares some of her delicious concoctions - The Lazy Wife.

Friday, November 22, 2013

Christmastime!

My lovely dear coworker was playing Christmas music the other day!  I usually try to refrain until at least the day immediately following Thanksgiving but considering the late nights and stress our office has been under I couldn't begrudge her this indulgence nor maintain the willpower to fight it.  It's Christmastime! It's so exciting it should just be one word.  The tree lots are being set up and my family and I are planning to rekindle an old family tradition and go cut down trees this year and I can't wait.

This will be my third Christmas in my house and each year I get a little better at decorating and making it feel like the holidays even though most of my holiday time is spent over at the parents house wit the siblings, cousins and grandma.  So since, the music has begun I clearly spent some time diving down the Pinterest rabbit hole to get some ideas for my front porch and mantle for the holidays.  Here's my current frontrunner, but check out the Curls Curves, and Sass Pinterest Board for lots of thoughts - ranging from super ambitious to I already have everything to do that.

Jingle bells, jingle bells....

Sunday, November 17, 2013

Craft day!

My friend and I spent all day Saturday, sewing, mending, attempting Pinterest projects, and generally feeling pretty self-congratulatory.

The one Pinterest project I tried does appear, at this point, to be a bit of a fail but I'll definitely keep you posted on the final outcome.  I attempted to make Christmas trees from twine, but at this point they are not pulling nicely off the cone forms. Final outcome TBD.

In other news I did complete another project off the list which was to complete some school colors scarves for my friend the high school teacher.  I originally was just making one for her but then realized I bought an excessive amount of yarn in her school colors so she ended up with 4 scarves total.  I suggested she use the extra three to bribe good behavior out of her students but I think she may instead give them to her fellow teachers.

Another project down!

Tuesday, November 5, 2013

Bedside Tables

This project was inspired by the many many Pinterest projects I found that took an old suitcase and turned it into a side table or an end table. There are countless iterations of this project and I'm not convinced that I approached this in the easiest of ways but I'm still happy with it in the end.

I eventually found my suitcase on ebay and used the pre-fab table legs from Home Depot.  I overestimated how high I wanted the table originally and so sawed them shorter.  In the end I used the other pieces on my coffee table that was shown in an earlier post.

I don't have pictures of the inside but on the inside for stability I used a piece of left over masonite that the legs will attach into and reinforcing the bottom of the suitcase. Then, using 4 table top leg plates, attached my 4 legs.  I was still in experimental mode or I would have painted them first but I wasn't sure so I ended up getting them attached and painting them afterwards - no worse for the wear.

I'm pretty happy with the end result though think there may be an easier way to build the second one for the other side (if I ever do)

Monday, November 4, 2013

Projects Update!

It has been a while but it doesn't mean I've forgotten this goal.  I've been working on a few items from the list and even incorporated one into the latest Coursera design course I'm taking.

I'm going to add in the updates, below.  This will include the updates from before and the most recent...

  1. Bedroom Makeover: At this point my bedroom still looks like a slightly grown up college dorm room, even though it is attached to a house I own! UPDATE:  I've been in touch with a local artist who works in reclaimed lumber and I'm commissioning a bed!  Going over to his studio this weekend to finalize the design details and then we're moving forward.  Thanks friends for this referral!  DONE!  I have been comfortably sleeping on my new bed for a month or two now.  I'm so happy with the final product.  I'll be sure to get a post up about this soon and link to the artist.  He does some great work!
  2. Color in the Kitchen: The kitchen is full of beige, I am not a beige person! Or if I have become one I no longer want to be one!
  3. Build 4 x 4 workbench:  As seen at an artist studio at American Steel Studios.  Forgot about this one, need to see about supplies
  4. Build nightstands I'm counting this one as DONE too.  I actually just finished up this project yesterday.  I'm being vague because I've actually only completed one nightstand but I'm pretty happy with it.  I also think that it has spurred another project that I've added to the bottom of the list.
  5. Run a race.  Getting there.  I've agreed to sign up and train for a race with my coworker.  I've agreed but haven't done anything yet :-/
  6. Front yard makeover: Want to replace lawn with native plants and drought resistant plants, tired of seeing brown grass.  I did mow it the other day, which felt like an accomplishment.
  7. Back yard makeover: Add fruit trees, cut out some lawn for "crops", create succulent planter
  8. Complete one new woodblock
  9. Take an art class
  10. Make a "pouf": Here's one project but maybe search because I know there were a couple that did it on the cheap using IKEA rugs I think. UPDATE:  I made an IKEA run and the rugs referenced in this pattern are no longer there, or weren't that day.  Thinking I can probably find a substitute though.
  11. Sew a complete item of clothing (more complicated than a skirt though) using a pattern. DONE. I made a fairly hideous pair of kulots/gaucho pants for our Troop Beverly Hills Halloween costume this year.  While it was not a true pattern, I did use a pair of pants I already have to create this pair and had to make some sizing adjustments and amendments as I went.  Let's just say I'm not destined for Project Runway anytime soon. 
  12. Design and get a tattoo: TGT tattoo or other UPDATE:  I've pinned some ideas to the Pinterest Board and I'm trying to pin down the girls on when we might do this.  P.s. TGT is what we've named our friend group - yup, we named ourselves.
  13. Make Christmas presents for my neighbors: Starting pinning mason jar gifts.  Just a nice thought and I like the idea of remaining close with the neighborhood.
  14. Build and paint a bean bag toss game: A family friend requested this game and while I'm not totally convinced that my construction skills are up to it I found a youtube telling me how and pinned it. I'm going to take some time this weekend to go and get the supplies and give it a go. Note: As I'm writing this I realize I'm referencing a lot of pins so I created a Pinterest board for this blog in case anyone wants to see them all in one place.  UPDATE: I've made a shopping list and purchased some of the supplies for this.  Found the plans.  Then life got in the way, trying to make time for this again.  Ack, still behind on this, fail.
  15. Sew baby blanket:  My good friend just had a baby and I want to send her a homemade baby blanket and one of my onesies from my etsy shop RadBaby.  DONE! See the post about making the blanket.  I recently got a photo back from my friend with her one month old swaddled up in it - baby adorablness.
  16. Add a new item for sale to RadBaby: Speaking of, this shop needs some new energy in it and I think a new product.  I'm working right now to keep it active and may do a sale to clear out some stock and then work to figure out another item to put up for sale.  I've gotten the suggestion of button earrings which could be cute especially using scrap fabric from our aprons.  DONE!  See the post about the new earrings we added.
  17. Complete a Coursera course:  I have signed up for Dino 101 and Intro to Computational Design (starting today!).  However my real project is to actually complete a course.  I took two others previously that I really enjoyed but I let life get in the way and didn't complete them.  UPDATE: Haven't completed either course yet, but still on the right track and not too far behind in either of them. It's still early yet though. DONE I completed all the lectures and assignments for Dino 101 - it was awesome.  I have given up on the Intro to Computational Design.  I enjoyed the first two modules, programming and photoshop, but the third is audio which does not interest me.
  18. Create a housewarming gift for friends that are moving. DONE!  I created a great housewarming gift in a mason jar for my best friend's brother and his girlfriend.  It took me forever to give to them but that is not part of this project so there.
  19. Add shelves and/or decor to the bathroom.
  20. Go to Zumba classes 2 times a week for at least a month. DONE!  Successfully accomplished and still going.  With the exception of some sick days we have been consistently going every week and plan to keep at it. It's a great break and separation from the day.  Plus an amazing instructor, which makes all the difference.
  21. Attach a charging pad in the new nightstand so that phone can charge just sitting on the nightstand.  I've seen this project online and thought this would work really well in my new suitcase nightstand.  Just need to research how much one of those costs and if I want to splurge.
  22. Build an acoustic speaker for iphones. DONE!  I actually built two, and gave one to Meg for her birthday.  I'm using this idea as a prototype for the next Coursera class I'm taking (Design) and am hoping to refine the design even more.  
Wow!  Finaly tally isn't looking so bad.  We're 5 months into my 30th year and I've come up with 22 of the 30 projects and completed 9 of those 22.  I was feeling like I'd been slacking but writing it down made me feel more accomplished.

Monday, September 23, 2013

Autumn Equinox


This is where I spent my weekend, with two great friends, celebrating the autumn equinox.  In usual fashion, I did not check the weather before heading up to the lake - why ruin the mystery? - and packed for the weather we've been experiencing here at home.  At home, not up in the Rockies, in late September...

Packed in my overnighter was one pair of jeans, shorts, flip flops, slip on sneakers, t-shirt/tank, two bathing suits, in case I swam so much I wanted to wear a different one, and on a whim a pair of sweat pants and a thermal shirt.  Thank god for that whim.

On our drive up there was pouring rain, and the occasional slush, and by the time we reached our friend's cabin it was 45 degrees out and my shorts seemed pretty laughable.  Lucky for us our friend was better prepared and had the fire above roaring to welcome us, as we bundled in what we had, borrowed socks, and pulled out our books and our (in my case) knitting.  It was an incredible way to celebrate the fall equinox, including a midnight stroll to the lake to see the harvest moon, with two important people in my life.

On a side note, inspired by a friend of mine who asked about knitting chevrons I embarked on an attempt to see if it would be something I could teach.  It's not too bad, but I'm still working out some kinks.